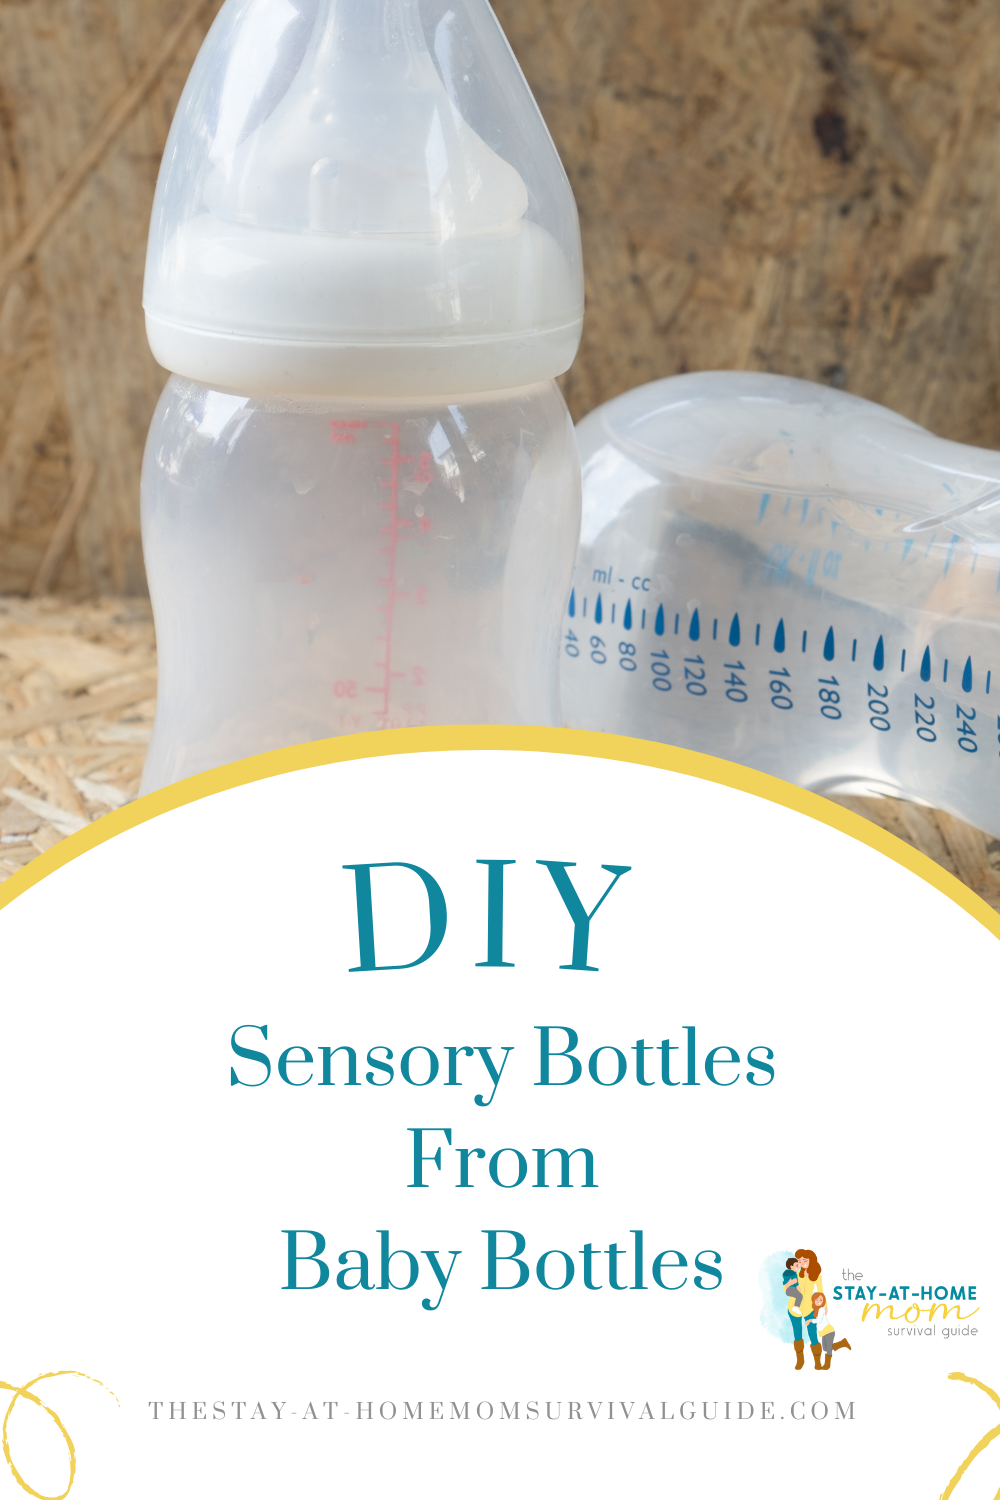
I was first introduced to DIY sensory bottles when I worked in a daycare center. These sensory toys are very easy to make, are great for older kids to help make, and can be made in a variety of sizes.
If you do not drink bottled water, you can use baby bottles. I have both a “wet” version and a “dry” version of these sensory bottles to share with you. Here is how I made our DIY sensory bottles from old baby bottles.
DIY Sensory Bottles for Babies
Wet Version:
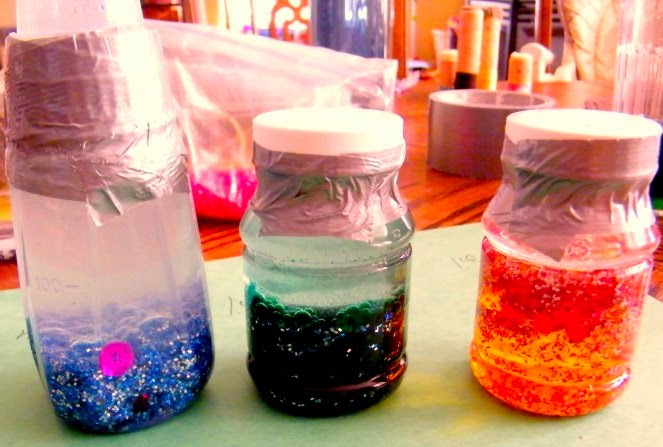
1) You need baby oil, water, food coloring, sequins, glitter, or small beads, duct tape, and a few baby bottles.
2) Fill each bottle with some oil.
I filled the one on the left 1/3 full of oil, the one in the middle was 1/2 full and the one on the right was 3/4 full of only oil.
I like how the bottle with 3/4 oil turned out the best.
3) Place sequins, little beads, or glitter into the bottle(s) as you like.
4) Place water in a cup, place a few drops of food coloring in the water, and mix to combine.
I used 2 cups: one with blue water and one with yellow water.Blue water was poured into the bottle on the left (in the below picture).
Yellow water was poured into the bottle on the right.
I mixed the remaining water in the two cups together (to make green) and then poured the green water in to the bottle in the middle.
The amount of water you need will be determined by how much space you have left in the bottle after the oil and decorative items.
The additions to this snowflake sensory bottle will give you more ideas of what to put in a sensory bottle. Any small visually stimulating items work well.
5) Place the lids on the bottles, and tape around the lid to create a seal and prevent any leaks (or skilled hands from opening the bottles and spilling the contents).
6) Shake! Observe how the elements mix and settle.
With the young ones you can talk about the colors that are seen. Older children can time or count how long it takes the contents to settle after the bottle has been shaken. This can be made into an ‘I Spy’ game if you place little toy items inside the bottle before sealing: Encourage your child to try to turn and roll the bottle.
Dry Version:
Using rice or beans-or both-pour some into an empty baby bottle. Screw on the top and tape if desired so that the contents do not spill.
You have a sensory bottle shaker!
This is easy to make with a variety of contents and is easy to change to maintain your infant’s interest. Since this can be a choking hazard if spilled, supervise when it is in use.
You can make all of these DIY sensory bottles and shakers and provide your infant with an interesting sensory play experience. I love quick, easy ideas!
Oh wow! These look so easy to make. My son loves to steal our bottled drinks so he can shake them, so I know this will be right up his alley. I think I'm going to try and superglue the caps shut.
Thank YOU, Shirley, for sharing with me that it was a success for you too. That makes me so happy! I hope the painting went well. That is a fun activity in our house too.
I have a page of toddler activities as well! So, scroll up to the top menu bar and click "Toddler Activities" and you will have a lot of fun things just right for your child. Thanks for stopping by!
You are very kind to say that! I am glad you are finding activities and support that is helpful. 🙂 Your daughter is at the perfect age to start introducing the sensory bottles and other sensory experiences because she is probably close to grasping if not already grasping toys with her hands, and the sensory bottles are a great thing to use during tummy time. Lay baby on her belly and place the bottle in front of her so she can see it and try to observe it and grab it. Talk about what she is seeing so she is gaining interaction from you and hearing language. Multiple bottles means more colors, textures, etc to look at and that can mean more time spent exploring! I wish you well and thanks for sharing here. Enjoy your little one.
Hi there! Welcome to my little corner of the internet. My name is Jaimi, and I am a mom who loves to encourage other mothers in the season of raising children, making a home, and staying focused on the end goals of motherhood.


What a fun activity!
It really was. My infants loved it.
Oh wow! These look so easy to make. My son loves to steal our bottled drinks so he can shake them, so I know this will be right up his alley. I think I'm going to try and superglue the caps shut.
Super easy, Laura! I like your idea of super glue. Hopefully that will seal them and avoid the "ugly" tape. 😉
Thank you for the great idea! I did this for my 15 month old and he's enjoying it! Tomorrow we're going to pain! Great site, thank you!
Thank YOU, Shirley, for sharing with me that it was a success for you too. That makes me so happy! I hope the painting went well. That is a fun activity in our house too.
I need something for a 17month little girl.
I have a page of toddler activities as well! So, scroll up to the top menu bar and click "Toddler Activities" and you will have a lot of fun things just right for your child. Thanks for stopping by!
My daughter is 4 months old. What is a good age to start the sensory bottles? Thank you so much! Your site is amazing!!!
You are very kind to say that! I am glad you are finding activities and support that is helpful. 🙂 Your daughter is at the perfect age to start introducing the sensory bottles and other sensory experiences because she is probably close to grasping if not already grasping toys with her hands, and the sensory bottles are a great thing to use during tummy time. Lay baby on her belly and place the bottle in front of her so she can see it and try to observe it and grab it. Talk about what she is seeing so she is gaining interaction from you and hearing language. Multiple bottles means more colors, textures, etc to look at and that can mean more time spent exploring! I wish you well and thanks for sharing here. Enjoy your little one.
Such a great idea! I made these today and DS is really enjoying them.
Yeah! I am so glad to hear that. Enjoy and thanks for sharing with me.